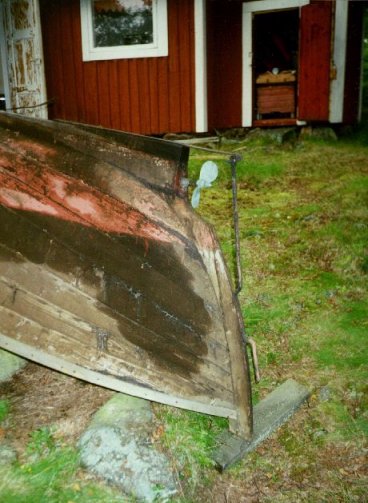
 The keel had rotten so bad it was almost hollow. Someone had attached an extension piece to
the keel with regular iron nails and wood had started to rot when the nails rusted in salt water.
The keel had rotten so bad it was almost hollow. Someone had attached an extension piece to
the keel with regular iron nails and wood had started to rot when the nails rusted in salt water.Restoring the hull
The keel had rotten so bad it was almost hollow. Someone had attached an extension piece to
the keel with regular iron nails and wood had started to rot when the nails rusted in salt water.
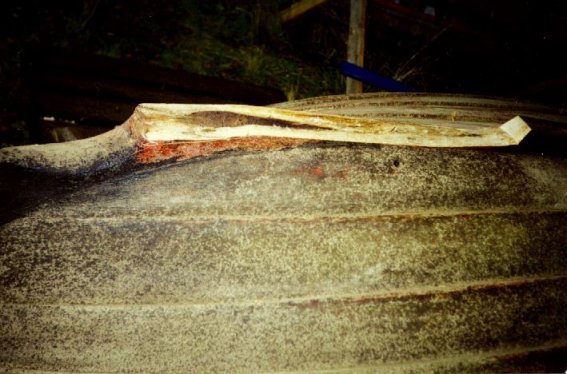 I planed all the rotten wood away. Luckily there was still over an inch of sound wood on the
thinnest place of the keel. At this point I had to do the hardest decision of the whole renovation process: whether to
remove the whole keel and replace it with fresh wood or use epoxy to glue new wood to the old one.
I planed all the rotten wood away. Luckily there was still over an inch of sound wood on the
thinnest place of the keel. At this point I had to do the hardest decision of the whole renovation process: whether to
remove the whole keel and replace it with fresh wood or use epoxy to glue new wood to the old one.
I wanted to respect the age and especially the style of the boat and use only materials and tools that could have been used 40 or 80 years ago. Epoxy didn't fit into this category, but since it would have been very laborious to remove the old keel I had to stick with the epoxy.
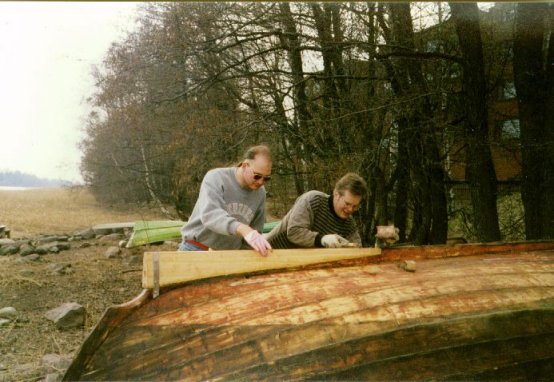 I used SP 106-epoxy to glue a 300x125 mm (12"x5") beam for the keel. The replacement was
about twice the length of the damaged part to ensure proper stiffness. It was attached to the boat with epoxy and
three bolts through the hull.
I used SP 106-epoxy to glue a 300x125 mm (12"x5") beam for the keel. The replacement was
about twice the length of the damaged part to ensure proper stiffness. It was attached to the boat with epoxy and
three bolts through the hull.
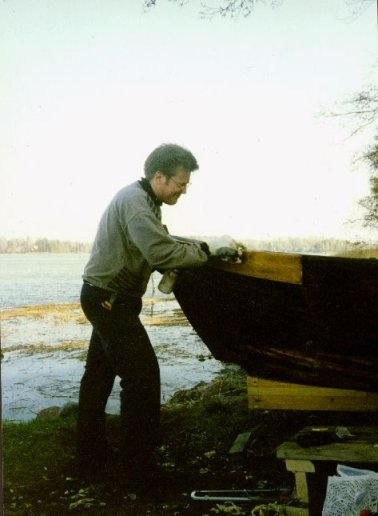
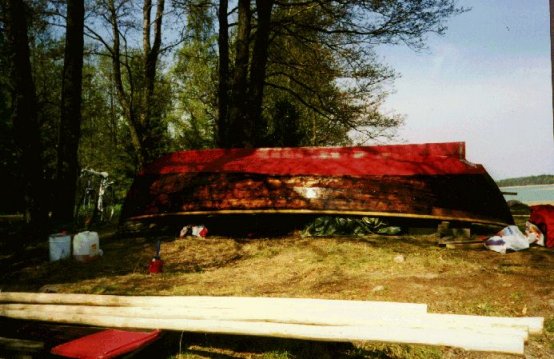
As you can see in the picture, a big part of the tar and paint had been scraped off at this point. First we scraped off all the tar on the outside of the hull. We used a butane torch to warm up the tar and scraped it off. It was very slow work and for weeks I thought I couldn't get the tar off under my nails ever.
 The topmost plank was practically rotten away and had to be changed partially. Before
installation the plank was impregnated with linseed oil, then soaked in cold sea water for a day and warmed up
with hot water for a few hours and "steamed" with a blowtorch just before installation.
The topmost plank was practically rotten away and had to be changed partially. Before
installation the plank was impregnated with linseed oil, then soaked in cold sea water for a day and warmed up
with hot water for a few hours and "steamed" with a blowtorch just before installation.
 The small rubrails were planed round as originals. In 70's the original battens were replaced
with rectangular ones. They looked quite crude, and they were worn and rotten. Luckily I found a few pictures of
boats that had been built in the same village as Manta at National Board of Antiquities in Helsinki and the battens
were constructed in the original way.
The small rubrails were planed round as originals. In 70's the original battens were replaced
with rectangular ones. They looked quite crude, and they were worn and rotten. Luckily I found a few pictures of
boats that had been built in the same village as Manta at National Board of Antiquities in Helsinki and the battens
were constructed in the original way.
 Manta was impregnated with linseed oil mixed with turpentine and a rot preservative that
contains copper naphtenate (brand is "Aspergol"). It absorbed 25 liters, about 5,5 gallons of the mixture. After that
it was tarred outside. On the inside we used a mixture that has approx. 3/6 of linseed oil, 2/6 of turpentine and 1/6
of tar. The mixture penetrates easily to the wood and dries very quickly, on a day or two. Because of the tar it also
makes an relatively durable surface, so we didn't have to have to use straight tar which dries slowly and becomes
tacky on hot summer days. The mixture of turpentine, linseed oil and tar has been used for centuries around the
Scandinavia.
Manta was impregnated with linseed oil mixed with turpentine and a rot preservative that
contains copper naphtenate (brand is "Aspergol"). It absorbed 25 liters, about 5,5 gallons of the mixture. After that
it was tarred outside. On the inside we used a mixture that has approx. 3/6 of linseed oil, 2/6 of turpentine and 1/6
of tar. The mixture penetrates easily to the wood and dries very quickly, on a day or two. Because of the tar it also
makes an relatively durable surface, so we didn't have to have to use straight tar which dries slowly and becomes
tacky on hot summer days. The mixture of turpentine, linseed oil and tar has been used for centuries around the
Scandinavia.
Good thing about mixture with tar is that it makes the surface more durable than plain linseed oil. Another bonus is that it gives the surfaces a reddish-brown silky finish that doesn't fade easily in the sun. Not to mention the lovely smell of tar.
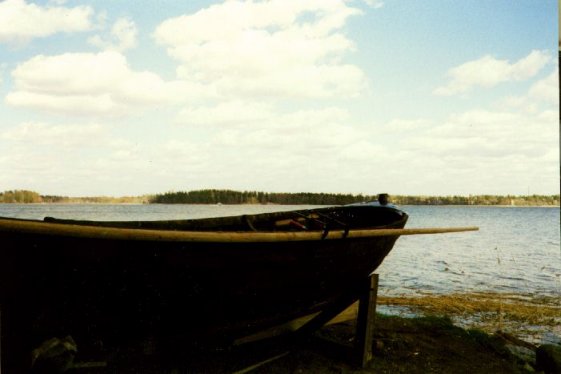
In the foreground you can see the rig, quite unfinished. After the picture I planed the mast and boom straight, attached the needed fittings and varnished it with boiled linseed oil.
 Bernard W110 is an air-cooled 4 hp four-stroke engine. The engine had badly worn valves and
it looked bad, but otherwise it was in pretty good condition.
Bernard W110 is an air-cooled 4 hp four-stroke engine. The engine had badly worn valves and
it looked bad, but otherwise it was in pretty good condition.
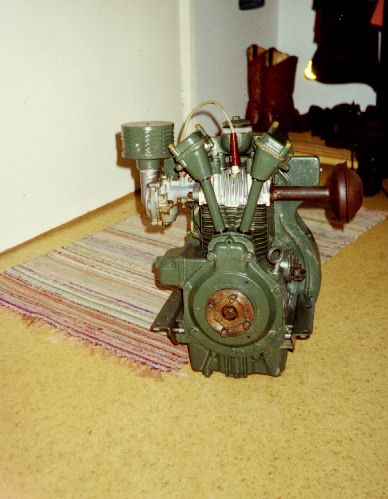 I took the motor apart, honed the valves, adjusted the timing and painted the whole motor. The
propeller shaft is directly attached to the motor, which means that the boat moves pretty fast always when the
motor is running. It also means that it's quite hard to navigate in a crowded harbour.
I took the motor apart, honed the valves, adjusted the timing and painted the whole motor. The
propeller shaft is directly attached to the motor, which means that the boat moves pretty fast always when the
motor is running. It also means that it's quite hard to navigate in a crowded harbour.
 After installing the propeller shaft and motor Manta was ready for launching. Moral of the story is,
that it is recommended to install the drain plug before launching. Now my thumb is acting as one.
After installing the propeller shaft and motor Manta was ready for launching. Moral of the story is,
that it is recommended to install the drain plug before launching. Now my thumb is acting as one.
Next part: Cotton sails and building the rig.
Back To the main page